
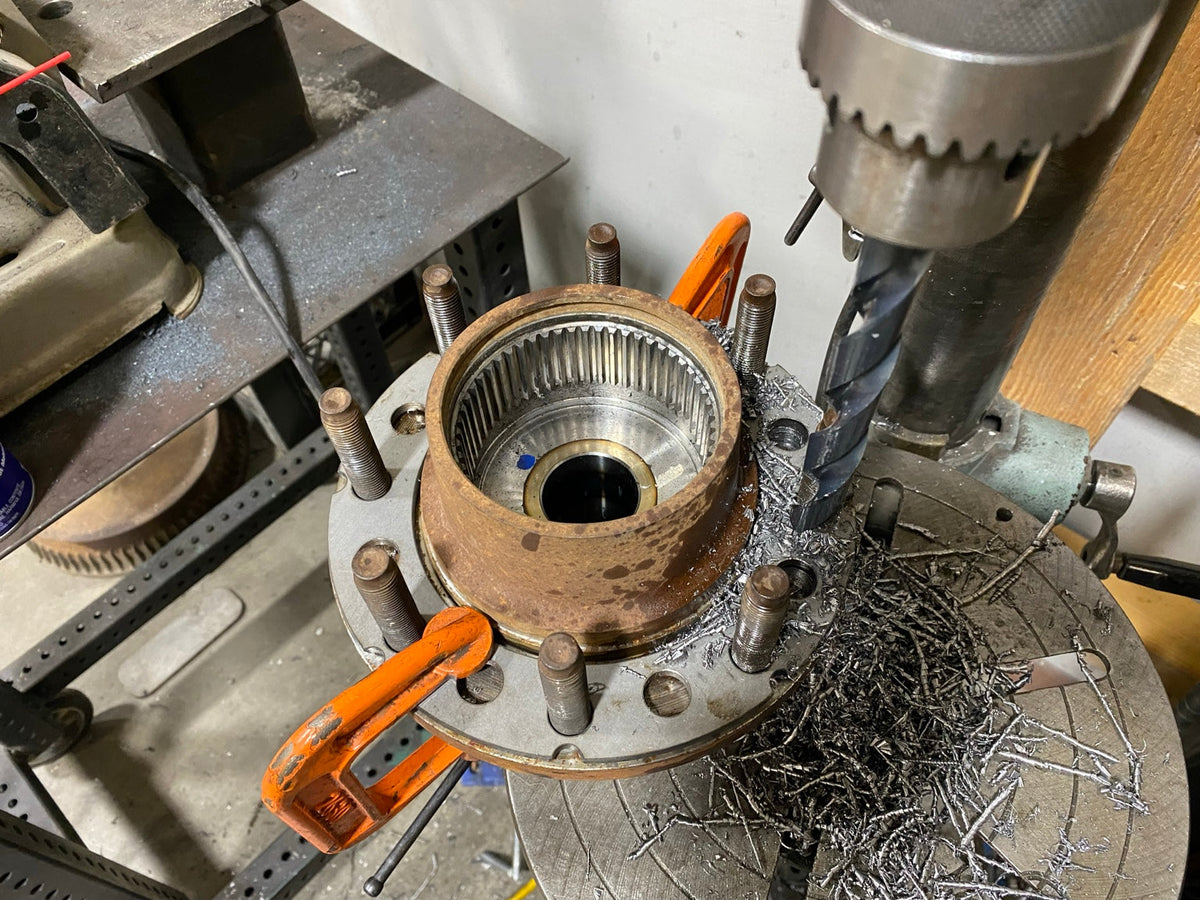
How to Use CNA Fabrication's 8-Lug Drill Templates
A step-by-step look at redrilling wheel hubs and brake rotors for a different 8-lug bolt pattern.
Changing wheel bolt patterns doesn't always mean replacing your entire axle or hub assembly. Depending on the application, redrilling the existing wheel mounting flange can be an option.
At CNA Fabrication, I developed our 8-lug drill templates to make locating a new bolt pattern easier and more repeatable. I originally made them while working on the Junkyard Jeepster. Here's how I use them.
Choosing the Correct Drill Template
We offer two templates for converting between 8x170mm and 8x6.5" (8x165.1mm) bolt patterns:
8x170mm to 8x6.5"
This version has half-circle cutouts around the outside edge. It starts with an 8x170mm hub and locates the new 8x6.5" pattern.

8x6.5" to 8x170mm
This version has half-diamond cutouts around the outside edge. It starts with an 8x6.5" hub and locates the new 8x170mm pattern.

The templates aren't interchangeable. For a closer look, see our 8x170 vs. 8x6.5 Drill Template Direction Guide.
Before modifying anything, verify that your hub, rotor, studs, and wheels are compatible with the conversion.
Step 1: Position the Template on the Hub
I leave the original wheel studs installed while drilling the new pattern. They help locate the template without measuring and marking every hole.
The template is designed to sit on the stud tapers, slightly above the unit-bearing face. It doesn't need to sit flush against the hub. Make sure it sits evenly on the tapers, then secure the hub assembly and template so nothing shifts while drilling.

Step 2: Drill the New Bolt Pattern
For my conversion, I use a 39/64" drill bit. I've had good results with the 39/64" drill bit from McMaster-Carr. It's cut through the wheel mounting flange easily and held up through multiple unit-bearing conversions.
I used to start each hole through the template, remove it, and then finish drilling. I've found it's easier to leave the template in place and drill directly through its guide holes to the finished diameter. That eliminates extra setup. I also prefer this over drilling a small pilot hole and opening it up afterward.
Important: The hole diameter needs to match the stud's knurl and required press fit. The 39/64" size is what I use for my application; it isn't a universal size for every hub and stud combination.
Make sure the hub and template are securely clamped before drilling.

Step 3: Inspect and Mark the Finished Holes
Remove the template and check that the new holes are clean, correctly located, and free of burrs. Verify the hole size and spacing before installing studs.
Helpful tip: Mark the newly drilled holes with a Sharpie. It's a simple way to avoid accidentally reinstalling the studs in the original pattern.

Step 4: Redrill the Brake Rotor
Depending on the application, the brake rotor may also need to be drilled for the new bolt pattern. I use the same template for this.
Unlike the hub, the rotor doesn't have studs to locate the template. I line it up with the desired pattern and clamp it securely before drilling.
The rotor holes are clearance holes, not press-fit stud holes. On my setup, the rotor's center bore centers it on the hub, so those holes don't need the same precision as the hub's stud holes. They still need enough clearance for the studs, and the rotor needs to sit flat and centered on the hub.

Step 5: Install the Wheel Studs
Once the hub is drilled and inspected, press the wheel studs into the newly drilled holes.
In some cases, the original studs can be reused after being pressed out, provided they are undamaged and still have the correct knurl fit and retention. If you use new studs, verify the knurl diameter, length, and fitment for your hub and wheels.
Use a suitable press and support tooling, and make sure each stud is fully seated.

Step 6: Final Assembly and Inspection
Before putting everything back together, check that:
- The wheel studs are fully seated and secure.
- The new bolt pattern matches your wheels.
- The brake rotor sits flat and centered on the hub.
- The rotor clears the studs.
- The wheel sits flat against the hub without interference.

Final Thoughts
I've used this process on my own Jeepster, and the templates have made locating the new bolt pattern much easier than laying out the holes individually. Leaving the template in place while drilling has also simplified the process.
If you're considering changing your 8-lug bolt pattern, take a look at our drill templates to see whether one fits your application.
This article shows the process used on a specific build, not a universal modification specification. Wheel mounting and brake components are safety-critical. Confirm the dimensions, compatibility, and condition of your components, and have the modification inspected by a qualified professional before road or trail use.